|
Quantum VS Help: Purchasing |
To add Progress Notes for a Purchase Order, Goods Received Note, or an individual line:
Note: This section assumes you have the relevant User Permissions and values enabled for adding Progress Notes. See Enabling Progress Notes.
1. Retrieve and open the Purchase Order or Goods Received Note. See:
Alternatively, select the Purchase Order Lines Finder:
2. Either:
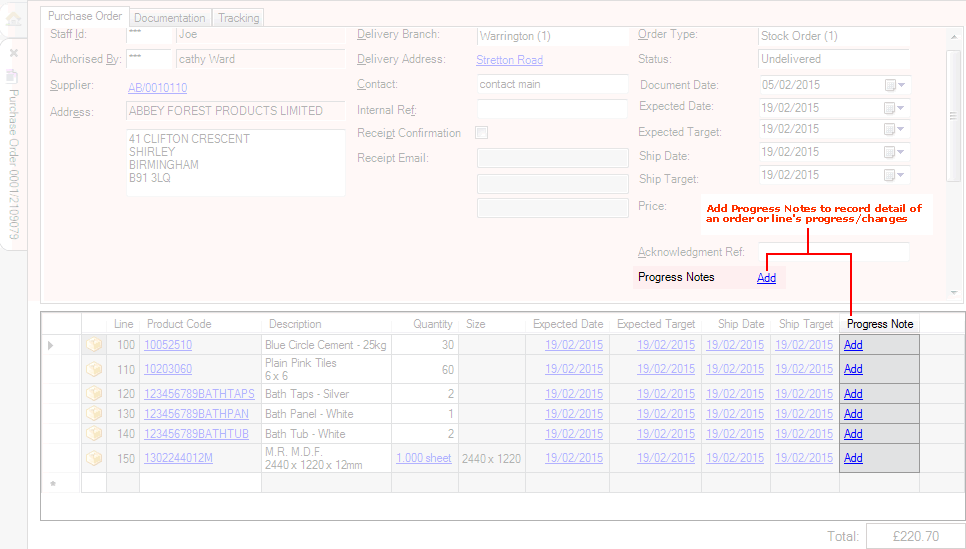
Click the Progress Notes Add hyperlink on the document header: to add a Progress Note which relates to the whole Purchase Order or Goods Received Note:

Or:
If the Purchase Orders Finder has been selected: click the Add Progress hyperlink within the Progress Note column.
Or:
If the Purchase Order Lines Finder has been selected: click the Add Progress Note hyperlink within the Progress Note Reason column.
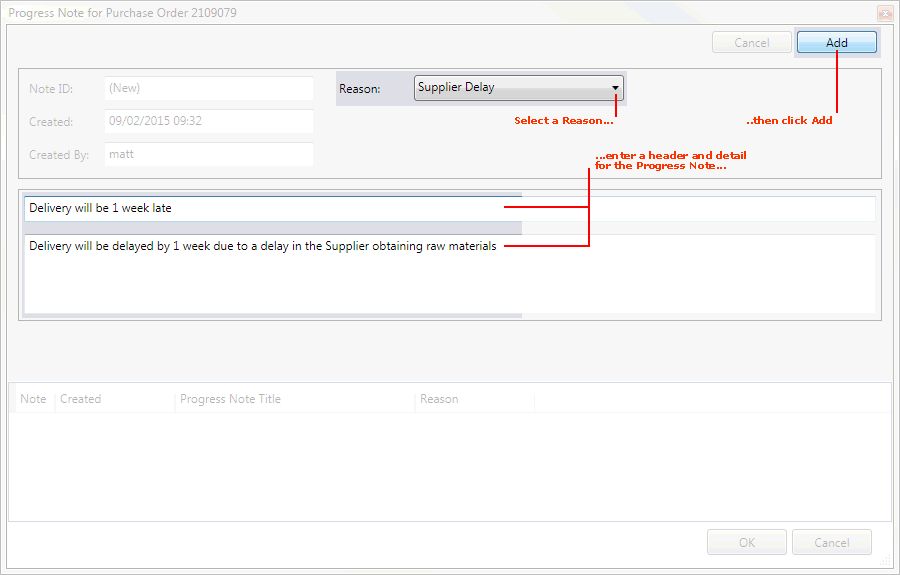
A blank Progress Note displays for the selected Purchase Order, Goods Received Note or line:

The upper section has the following fields:
Note ID: The ID number of the Progress Note. This defaults to (New) for a new Progress Note.
Created: The date and time on which the Progress Note was created.
Created By: The User name of the user who created the Progress Note.
You will now need to enter details for the new Progress Note.
Note: Click [Tab] or use your mouse to move from one field to the next.
3. In the Reason menu, select the reason for raising or editing the Progress Note (e.g. Supplier Delay) - as shown in the above example.
4. In the 'upper' text field, enter a title/summary for the Progress Note (required) - as shown in the above example.
5. In the 'lower' text field, enter the main detail of the Progress Note - as shown in the above example.
6. Click Add to add the Progress Note - as shown in the above example.
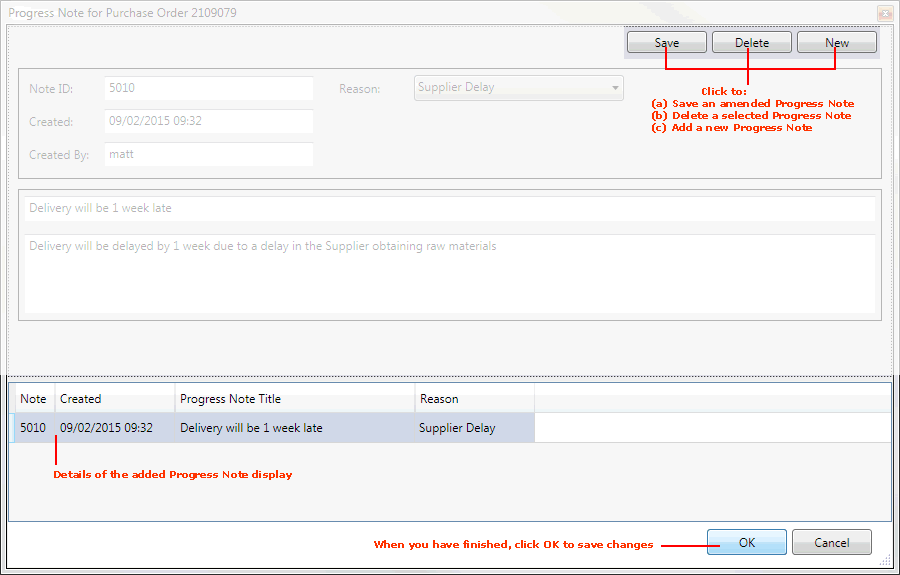
7. Details of the added Progress Note display in the lower window section:

At this point you may:
Add another Progress Note for the document or line by clicking New and repeating the above steps (from Step 3). See Adding Further Progress Notes.
Edit a selected Progress Note (i.e. the line highlighted in the lower window section) by editing the Reason/title/detail fields and clicking Save. See Editing Progress Notes.
Delete a selected Progress Note (i.e. the line highlighted in the lower window section) by clicking Delete. See Deleting Progress Notes.
8. When you have finished, click OK to close the Progress Notes window and save changes. (Or, click Cancel to cancel any changes made.)
The Progress Notes hyperlink for the Purchase Order, Goods Received Note or individual line displays the date and time of the most recent Progress Note. Click this to view, add more, edit or delete Progress Notes for the document or line.