Creating An ETL Routine Record
ETL Routine Maintenance enables the creation of discrete import/export routines which can be used to:
Note: See also: ETL Routine Maintenance. For an overview, including enabling and running ETL Routines, see ETL Maintenance.
To create an ETL Routine record:
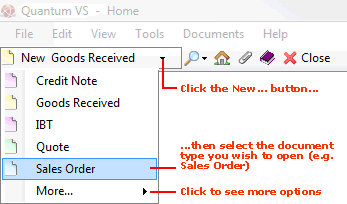
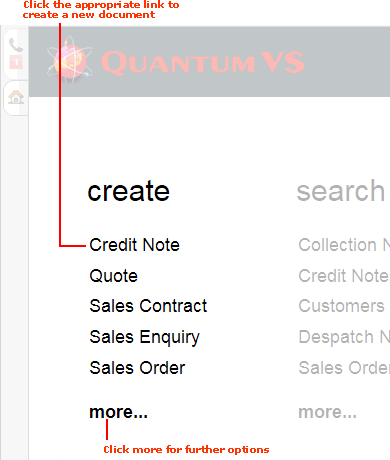
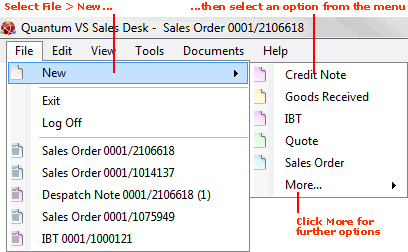
1. Use one of the following methods to create a new ETL Routine record.
A new ETL Routine record will open in a new tab:
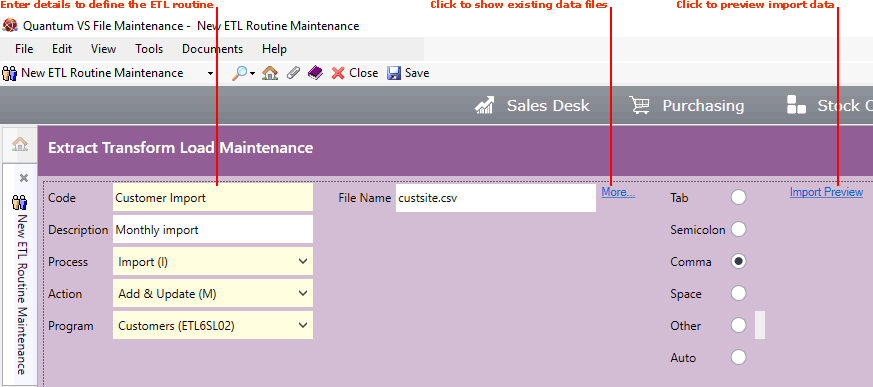
2. Enter the details for the ETL Routine in the various available fields and sections, using the information below as guidance:
Note: Use your [Tab] key to move from one field to the next. Mandatory Fields (fields which must contain a value before a function can be completed) have a yellow background.
|
Field
|
Definition (* = mandatory field)
|
|
Code *
|
Enter a Code (i.e. the record name) to be used for this ETL Routine; e.g. Customer Import.
|
|
Description
|
You may optionally enter additional descriptive text to help you recognise this ETL Routine; e.g. Monthly customer data import.
|
|
Process *
|
Select either:
|
|
Action *
(Import routines only)
|
Select the required action when data is imported, from the following:
-
Add - to add new data only
-
Update - to update existing data only
-
Add and Update - to add new data and update existing data
|
|
Program *
|
Select the appropriate Program from the available options; e.g. Customers (ETL6SL02).
Note: Programs available in the drop-down menu must be set up in the table file 'Data' (Data Loader Definitions) using Table File Maintenance. The 'Data' table file holds values which link the back-end Cobol routine (e.g. ETL6SL02) with a more user-friendly term associated with a data import or export routine (e.g. Customers). IMPORTANT: Program values in the 'Data' table file must be set up by an EDP implementer; it is not necessary for Users to set these up.
|
|
File Name
|
Enter the name of the file the ETL routine will use; i.e. the file data will be imported from or exported to.
Note: If no file name is entered, the File Name will default to the Program plus a txt extension (e.g. ETL6SL02.txt).
Selecting A Data File
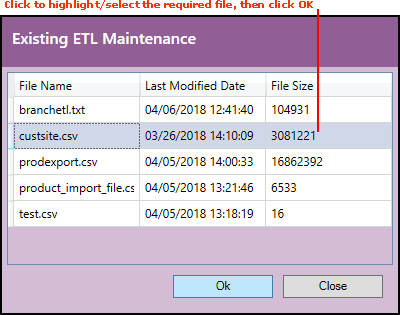
Clicking the More... hyperlink to the right of the File Name field (as shown above) displays a list of available data files for selection.
Note: These data files must exist in the appropriate location on the Quantum VS server.
Click to highlight the required file, then click OK:
|
|
|
Note: * = mandatory field
|
3. Select the delimiter character to use in the data import or export routine, from the following options:
-
Tab
-
Semicolon
-
Comma
-
Space
You may choose an alternative by selecting Other then entering the character in the field to the right.
4. If you are defining an:
5. When you have completed the fields as required, select Save from the Toolbar - Sub Menu to save the new record.
6. Once the record has been saved you may:
When creating an 'import' ETL Routine you will need to preview and validate the data before saving the record. This helps determine whether (1) the data is correct (i.e. you have selected the correct import file); and (2) the formatting is correct (i.e. you have selected the correct delimiter). To do this, follow the steps below.
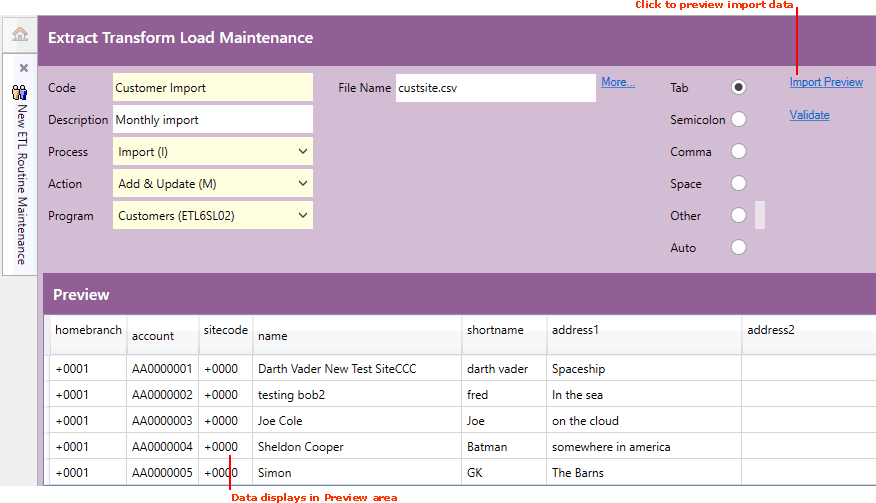
1. To preview the data, click Import Preview.
Note: Data will only display if you have correctly entered/selected a File Name, as described above.
The first 5 lines from the chosen file on the server will now display in the Preview area:
If The Data Is Incorrect
If the data is incorrect (e.g. you are importing Customer data but Supplier data displays), select an alternative File Name and repeat the Import Preview procedure as described.
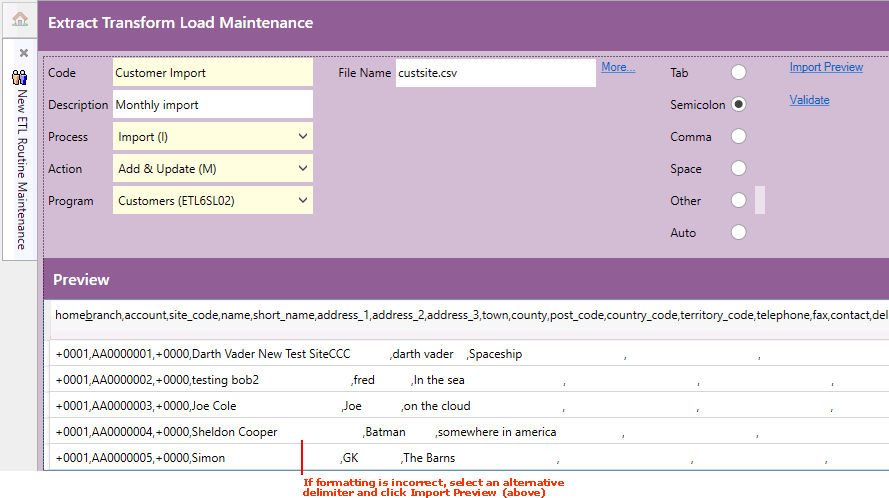
If The Formatting Is Incorrect
If the wrong delimiter has been selected, as in the following example, select an alternative delimiter then repeat the Import Preview procedure as described:
2. To validate the data (i.e. determine that the application and server can communicate with the selected file), click Validate.
Note: The 'Validate' link becomes available only when you have previewed import data and mandatory fields have been completed.
If validation was:
-
Successful (i.e. the 'validated successfully' dialogue displays): Click OK to close the window. You may now save the ETL Routine record and continue as described above.
-
Unsuccessful (i.e. 'File Not Found' displays): Check server connections and file placement, then repeat the above steps.
When import data has been validated you may continue by saving the record as described above.
NEXT: Editing An ETL Routine Record
