Finding Customers
You may use the Finder to:
-
show details of your Customers;
-
locate a specific Customer record; and
-
open a Customer record for viewing/editing (or add its details to an open document).
Note: Rather than using your mouse, it is possible to use your keyboard to activate the required record type in the Finder, browse records in the Finder, then open the record in a new tab or add it to an open document. See Using Keyboard Shortcuts With The Finder.
Displaying Customers In The Finder
To show Customers in the Finder:
-
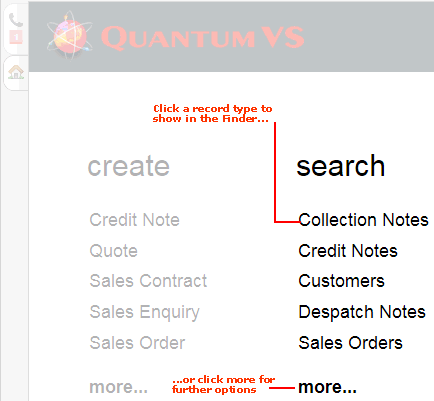
From the Home tab: under search, select Customers.
-
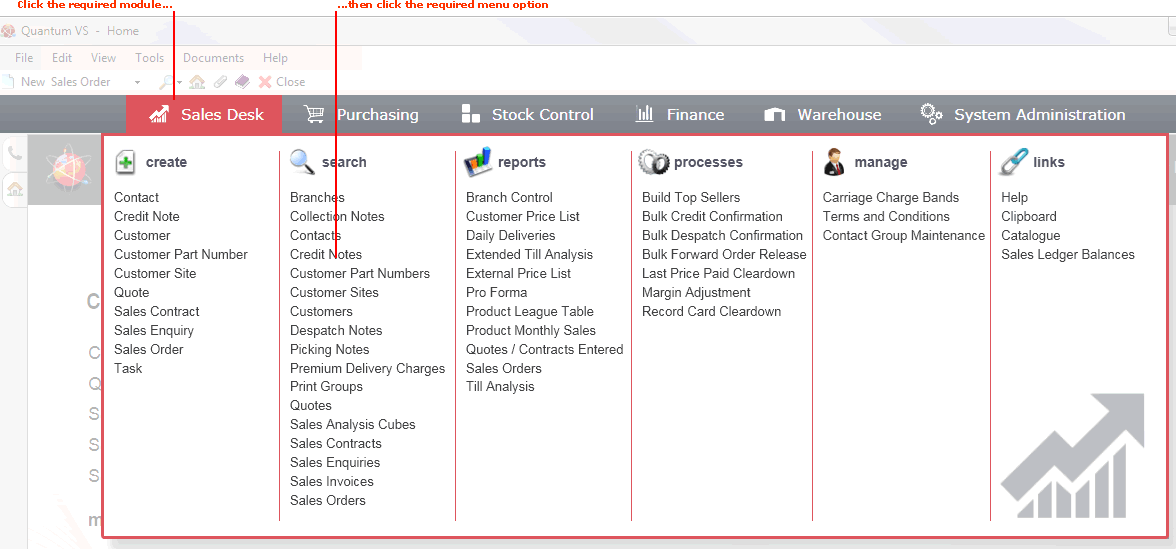
Or: Use the search section in the Mega Menu to select Customers.
-
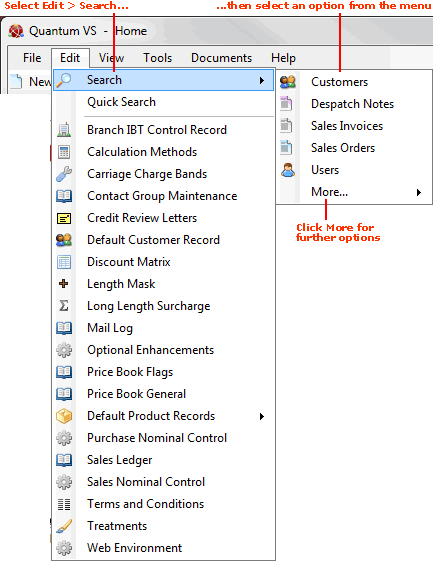
Or: From the main menu: select Edit > Search, then select Customers.
-
Or: In the Finder: click the 'down' arrow on the Search... button and select Customers from the menu.
Your Customer records will be listed in the Finder. For example:

For further details and column definitions see Customer Maintenance.
Note: Additional User Defined Fields will display in the Finder if the 'Show In Finder?' option was selected when Creating User Defined Fields. Fields will display data if it has been entered for a Customer.
Note: You may change the sequence of records displayed - see Changing The Search Sequence.
Browsing Customer Records
If more than one page of records is displayed in the Finder you may click the blue arrow keys on the Finder Toolbar to scroll through pages of records and/or enter/select a page number. For example, entering 40 will show the 40th page of results. See Browsing Records in The Finder.
Opening A Customer Record From The Finder
To open the required record from the Finder, either:
-
Click the Account hyperlink of the record you wish to open.
-
Or: Right-click on the line of the record, then select the View... option.
Note: An alternative method of opening a Customer record is to click the Customer account hyperlink on an open document (e.g. Sales Order, Picking Note, Despatch Note etc.).
The record will open in a new tab. For further details see Customer Maintenance.
Changing The Sequence
You may wish to alter the sequence in which the records are displayed in the Finder. To do this:
1. Click Advanced on the Finder Toolbar.
2. The Search menu shows the current order in which records are displayed. To change the sequence, select an alternative option from the menu.
Customers have the following Sequence options:
-
Customer Record: Display Customers/search results in Customer Record number order.
-
Customer Account: Display Customers/search results in Customer Account number order.
-
Name: Display Customers/search results in Name order.
-
Short Name: Display Customers/search results in Short Name order.
-
Post Code: Display Customers/search results in Post Code order.
-
Telephone: Display Customers/search results in Telephone number order.
-
Address: Display Customers/search results in Address order.
-
Balance: Display Customers/search results in Balance order.
-
Credit Limit: Display Customers/search results in Credit Limit order.
You may also change the sort order by selecting either A to Z or Z to A.
3. Click the Search (magnifying glass) icon  on the Finder toolbar. The records will be re-sequenced based on the chosen Search option.
Searching For A Specific Record
To find a specific record without having to browse through pages of records:
1. Type an appropriate search term into the search field on the Finder Toolbar.
The search term you enter should relate to the Search option selected - see above. For example, if the Search option is Short Name then enter all or part of the Short Name.
Note: You may click the down arrow within the Search field to view and select a recent search.
2. Click the search (magnifying glass) icon  on the Finder toolbar.
Either:
-
The records will be re-sequenced in the Finder, with the nearest matching record displayed at the top.
-
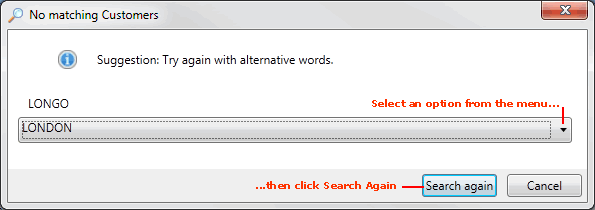
Or: The No Matching Customers window will appear:

The No Matching Customers window may appear if no match is found for the search term you enter. You may wish to select an alternative from the available options and then click Search Again.
Filtering Customers
You may use filters to control which records are displayed in the Finder. To filter Customers:
1. Click Advanced on the Finder Toolbar.
2. By default, all Customer (a) Account Types, (b) Site Codes, (c) Statuses and (d) Balances are displayed in the results (i.e. all of the Account Type, Site Codes, Status and Balances fields are checked). To reduce the number of results you may uncheck the following fields:
Account Type:
-
All: Show Customers of every Account Type
-
Credit Accounts: Show Customers assigned the Account Type 'Credit Account'
-
Trade Cash: Show Customers assigned the Account Type 'Trade Cash'
-
Retail: Show Customers assigned the Account Type 'Retail'
-
Prospects: Show Customers assigned the Account Type 'Prospect'
-
Staff: Show Customers assigned the Account Type 'Staff'
-
Inter Group: Show Customers assigned the Account Type 'Inter Group'
Site Codes:
-
All: Show Customers of every Site Code type
-
Customer: Show 'main Site' Customers
-
Sites: Show 'non-main Site' Customers
Status:
-
All: Show Customers of every Status type
-
Normal: Show Customers assigned the Status 'Normal'
-
Warning: Show Customers assigned the Status 'Warning'
-
Stopped: Show Customers assigned the Status 'Stopped'
-
Deleted: Show Customers assigned the Status 'Deleted'
Balances:
-
All: Show all Customer Balance types
-
Current: Show Customers with Current balances
-
30 Day / 60 Day / 90 Day / 120 Day / 150 Day + / Next Month: Show Customers with balances for the months listed
-
On Order: Show Customers with 'On Order' balances
-
Unapplied: Show Customers with 'On Order' balances
-
Cr. Limit Exceeded: Show Customers with 'Credit Limit Exceeded' balances
-
In Credit: Show Customers with 'In Credit' balances
You must ensure that at least one filter from each category listed above is selected, otherwise no results will be returned. For example, to show ONLY Retail Customers (i.e. Customers with the Account Type 'Retail'):
-
Under Account Type, ensure only the Retail box is checked.
-
Ensure All or at least one box is checked in the Site Codes, Status and Balances sections.
3. Click the search (magnifying glass) icon  on the Finder toolbar.
The selected records will be displayed in the Finder.
Note: To list all records again: check the All field(s) then click the search (magnifying glass) icon  on the Finder toolbar.
NEXT: Finding Customer Part Number Records


