|
Quantum VS Help: Document Scanning |
The first stage of the Bulk Document Scanning procedure involves the user scanning a pile of physical documents, such as Picking Notes or Despatch Notes.
Note: For further details see Document Scanning: FAQs. For prerequisites see Setting Up Document Scanning.
To perform Bulk Document Scanning:
1. From the Toolbar - Main Menu: select Tools > Scan Documents.
The Scan Documents tab opens.
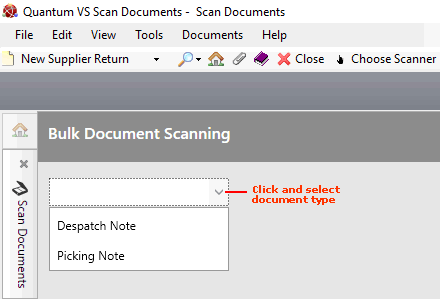
2. If no document type is selected, use the drop-down menu to select the document type to be scanned (i.e. Picking Note or Despatch Note):

Note: Only document types enabled/selected in Optional Enhancements > Modules 004 - Document Scanning will display in this list. See Setting Up Document Scanning.
3. Ensure everything is ready for scanning:
Switch on your scanner;
Ensure the scanner is connected to the PC running Quantum VS; and:
Load the documents to be scanned. If you are scanning a large number of documents, load the first batch of documents to be scanned.
Optional: To ensure the correct scanner is selected for scanning, click Choose Scanner on the Toolbar - Sub Menu, select Show Scanner Settings and click OK. A list of available Sources (i.e. scanners) is displayed. The scanner you wish to use should be highlighted. To select an alternative scanner, click to highlight it in the list then click Select (or Cancel to cancel the selection).
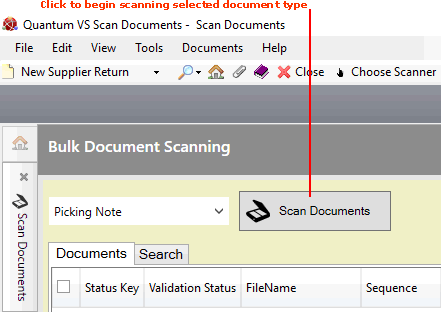
4. To begin scanning the selected document type, click Scan Documents:

Your scanner will automatically begin scanning the loaded documents.
Note: Temporary windows display when scanning begins. To stop scanning (e.g. if you clicked Scan Documents in error) click STOP.
If the scanner's 'Preferences' window displays at this point, see If The Scanner's Preferences Window Displays.
Scanned documents are added to the list (in the Documents area of the Scan Documents tab) and remain there until they are archived or deleted. Their status after scanning and before detection is Not Validated, indicating they have not yet been processed or matched with an existing document. Each document's Scanned Date is displayed, while Sequence shows the position of each document in the batch when it was scanned. For example:

You may now proceed with 'detecting' the scanned documents if you wish, although a number of options are available at this point. After scanning you may:
Scan further documents as described above. These will be added to the list in the Scan Documents tab.
'Detect' the scanned documents. See Bulk Document Scanning: Detecting Documents.
View scanned documents, change their order, or delete them (e.g. if the documents are incorrect, damaged or illegible). See Viewing, Reordering And Deleting Documents.
Close the Scan Documents tab without continuing. All non-archived documents will remain in the list when you log back on or re-open the Scan Documents tab.