Creating Tasks
There are two basic methods of creating Tasks. One method is to create a new Task record, select a Category - which may include selecting a Customer, Supplier or Branch - then enter the remaining details to define and save the Task. See Creating A New Task Record below.
Alternatively, if you already have a particular Customer, Supplier or Branch selected, you may create a Task for the current Customer/Supplier/Branch from the Tasks tab of the Customer/Supplier/Branch record. To do this, see:
To create a new Task:
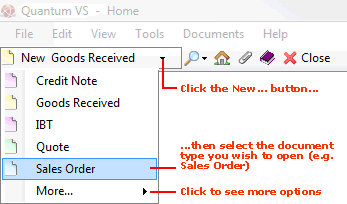
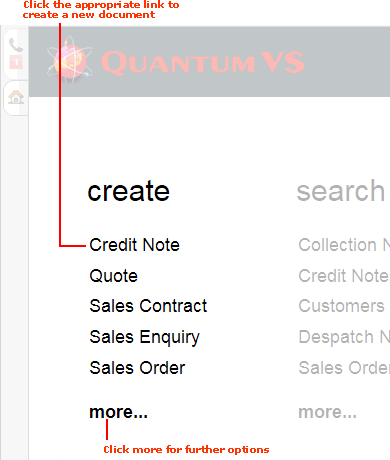
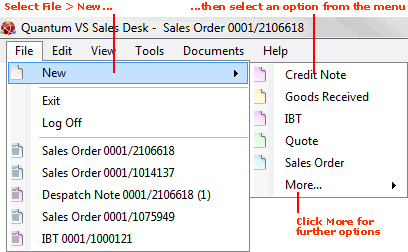
1. Do one of the following:
A new Task record will open in a new tab:

2. Select the Task Category and Branch/Customer/Supplier (if applicable). Either:
-
Leave the Category General selected: if the Task is not linked to a particular Branch, Customer or Supplier.
-
Or: Use the Category menu to select Branch, Customer or Supplier: if the Task is for a particular Branch, Customer or Supplier.
If you selected the Category Branch, Customer or Supplier, tab to the field below and either:
-
Manually enter the account number of the Customer / Supplier / Branch. Or:
-
If you don't know the account number, click [F3] to access the context-sensitive Finder (i.e. make Customers, Suppliers or Branches active in the Finder) then use the Finder to find and select the Customer / Supplier / Branch.
For further details see:
3. Enter/select the following Task details, using the information below as guidance:
|
Field
|
Definition
|
|
Priority
|
Use the drop-down menu to select the Task priority: High, Medium or Low.
|
|
Status
|
Use the drop-down menu to select the Task status: In Progress, Completed, Not Started, Deferred etc.
|
|
Assigned To
|
Select the User the Task will be assigned to. This is the person who will actually carry out the Task.
By default this Task will be assigned to yourself. If necessary you may use the drop-down menu to select another user to assign the Task to.
Note: The User to whom this Task is assigned will see the Task displayed in My Diary. See Viewing My Tasks.
|
|
Start Date / Due Date
|
Enter one or both of the following:
To set a Start and/or Due Date and time:
-
Check the Start Date and/or Due Date field as appropriate.
-
Select the date. Either type in the date in the field to the right (in the format 01/01/20XX) or click the calendar icon to select a date.
-
Use the 'time' drop-downs to select a Start / Due time for the Task.
|
Note: The Linked Documents section shows any documents (e.g. Sales Orders) linked to the Task. These are added automatically by the system.
4. Enter/select the Task Subject, and in the section below add the Task content:
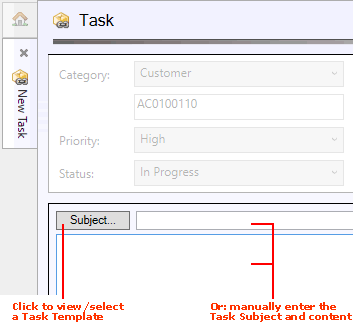
Note: If the Task is to be sent via email, the Task subject is effectively the email subject and the Task content is the email content.
Entering The Task Subject And Content Manually
You may manually enter the Subject and content if you prefer, or amend/add to any text selected from a Task Template.
Using A Task Template
You may use a Task Template (if available - see note) to automatically enter the Task Subject and content. To do this, click Subject.
The Task Messages window displays:
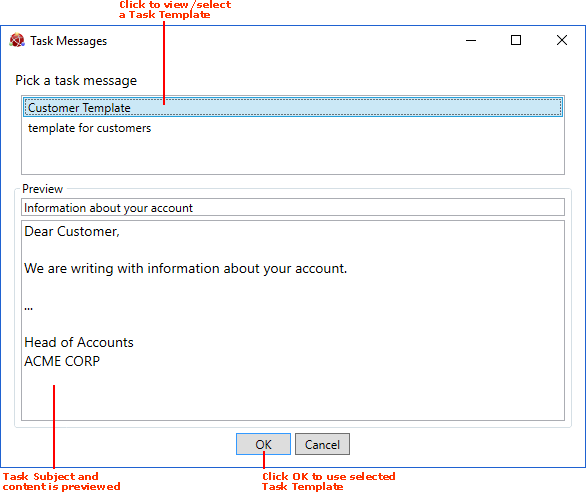
Note: Task Templates display only if they have been set up (for Customers/Branches/Suppliers/General) and are configured so that you can access them. See Creating Task Templates and Task Template Maintenance.
Under Pick a task message, click to select a Task Template.
The Task Subject and content used by the template is previewed in the Preview section below. To select this template, click OK.
The Subject and content is added to the Task automatically. You may amend/add to this text as appropriate.
5. If the Task is an 'email' Task, enter/select the email recipient.
Note: If the Task is not an 'email' Task, go to the next step.
You may type in one or multiple email addresses manually.
Alternatively, click Email To to show a list of email addresses saved for Contacts linked to the selected Customer/Supplier/Branch:

The Contact Point selection window displays:
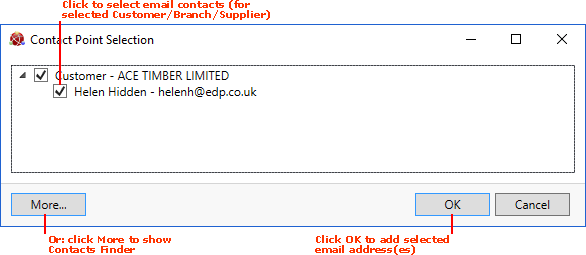
Existing email contacts set up for the selected Customer/Branch/Supplier are listed. Click to select email addresses as required.
If necessary, click More to display the Contacts Finder. Here you may select further email contacts as necessary. See Finding Contacts.
When you have finished, click OK. Selected email addresses will now display next to the Email To field.
6. When you have finished adding Task details, click:
And/or:
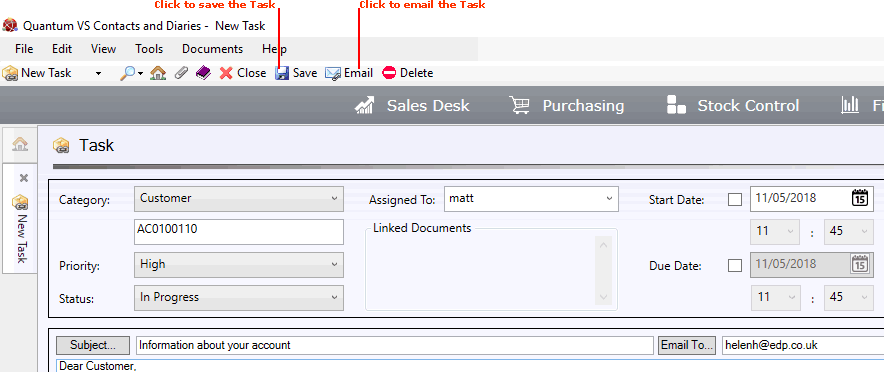
The saved Task details will be shown in the following locations:
For further details see Viewing And Completing Tasks.
NEXT: Editing Tasks
