Working With Files And Records
There are broadly two types of file/record type System Administrators will be working with in Quantum VS:
-
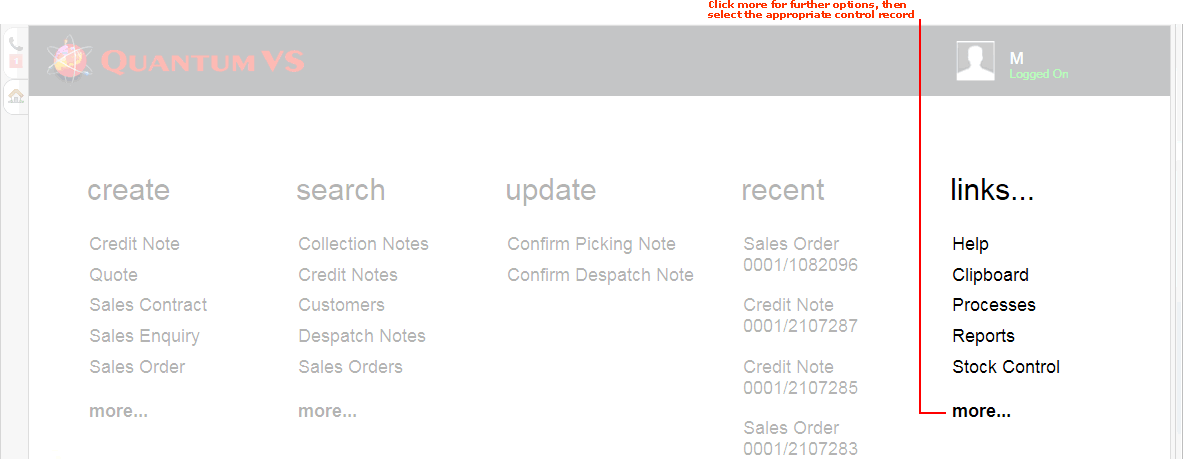
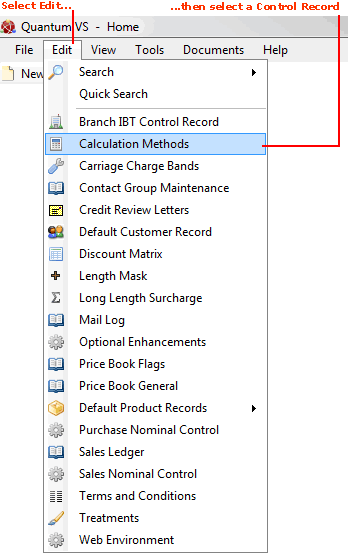
Control records: These are records where there only one 'control record' in Quantum VS, such as the Sales Ledger. Control records may only be viewed and amended (i.e. edited) by users with appropriate privileges, and not created or deleted. They may be selected: (a) from the Edit menu on the Main Toolbar; or (b) from the links section of the Home tab, by selecting more; or (c) from the Mega Menu, by clicking the appropriate module. For further details see System Administration.
-
Admin files/records: These are record types where there will be multiple files, such as Customers. These may be viewed, created, amended (i.e. edited) and deleted by users with appropriate privileges.
Below is some general advice when working with admin files/records. This section covers:
Note: You may also customise files/records; i.e. add, remove and move the tabs and fields visible when viewing, creating and/or editing an 'admin' record type, such as your Product and Customer records. see Customising Records.
There are various ways of accessing documents/records in order to view them:
Sometimes you may need to add information from one open record to another. For example, you may have opened a Customer record and at the same time created a new Sales Order, and now wish to add the Customer to the Sales Order header.
When a record - such as a Sales Order - is open, the greyed-out button Add To Document is shown on the Toolbar - Sub Menu. This menu item becomes active when another document/record is open at the same time.
This feature can be used to add information from one open record (e.g. Customer record) to another (e.g. a Sales Order). The button is re-labelled accordingly (e.g. Add To New Sales Order). For example:
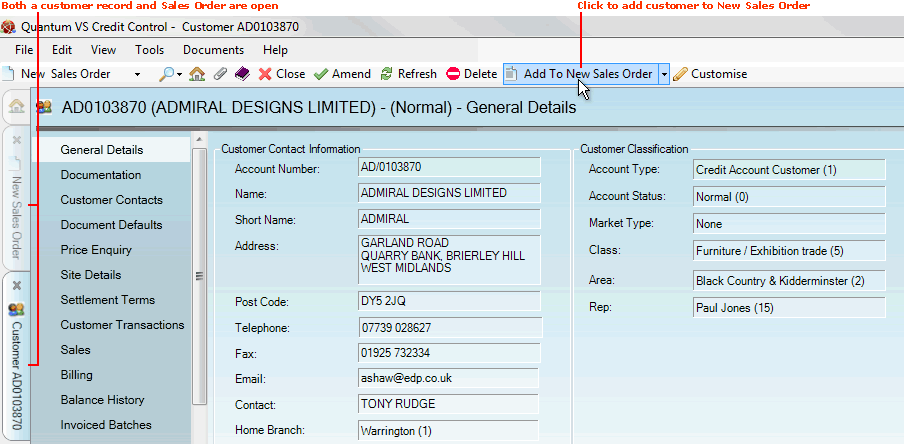
Sometimes you may need to add information from different types of record. For example - adding Supplier details to a Purchase Order.
The general procedure for creating a new document/record is as follows. Here we will use the example of creating a Customer record:
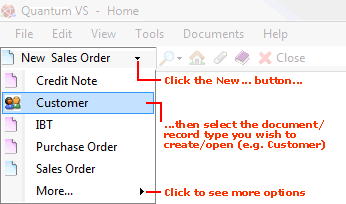
(a) From the Toolbar - Sub Menu: click the arrow next to New... then select Customer.
OR: (b) If 'Customer' is the current 'default document' (i.e. the document type currently selected in the New... menu on the left of the Toolbar - Sub Menu): click [F5] on your keyboard.
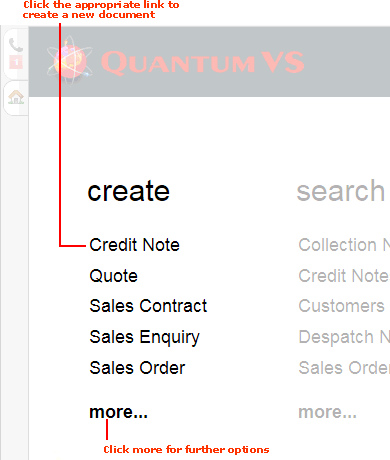
OR: (c) From the Home tab: under create, select Customer.
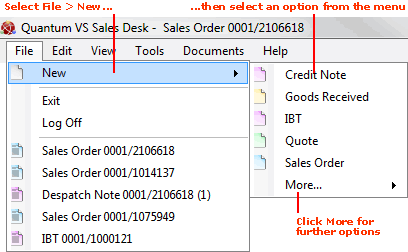
OR: (d) From the Toolbar Main Menu: select File > New then select Customer from the menu.
OR: (e) From the Finder Toolbar: click the arrow on the Search... button and select Search Customers (any Customers created will appear in the search results) then select New Customer from the Finder toolbar. See example:
OR: (f) Click the appropriate module on the Mega Menu (e.g. Sales Desk), then under create select Customer.
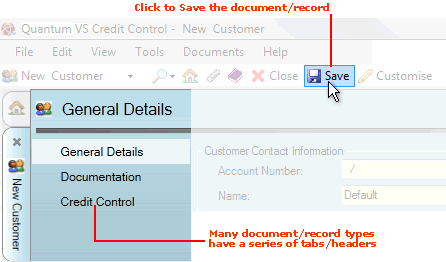
A new record will open in a new tab. Many record types - such as Customers - have a series of tabs/headers on the left-hand side for viewing/adding additional details.
Enter information in the various fields - selecting additional tabs/headers as necessary - then click Save on the Toolbar - Sub Menu to save the new record:
The editing procedure is the same for most record types: find and open the record you wish to edit, click Amend, make your changes as required, then save the record. To edit an existing record:
1. Use the Finder to find and open the required record. See Record Types Available In The Finder for advice on searching for a specific record, depending on the record type.
2. Make the record active by selecting Amend from the Toolbar - Sub Menu:

3. Make your changes to the fields as required, then select Save from the Toolbar - Sub Menu to save the amended record.
Note: When amending records you may click Refresh on the Toolbar - Sub Menu to refresh/update the record.
When you make a record editable/amendable - see Editing (Amending) Records above - the Enquiry button appears on the toolbar:

Click Enquiry to return to Enquiry (i.e. non-amendable/editable) mode.
To delete an open record, click Delete on the Toolbar - Sub Menu, then click Yes to the 'Are you sure you wish to delete...?' dialogue.
The record is deleted from the system.
When setting up a record, in order to complete certain fields you may need to select an option from a drop-down menu. For example, when creating a new Customer record the Rep field allows you to assign a sales representative to the customer, by selecting one of your reps from a drop-down menu.
This drop-down menu is populated via a Table File (in this case the 'rep' Table File). You may edit certain Table Files if you need to add to/edit these menu options. For details see Table File Maintenance.
NEXT: Customising Records
