Entering Supplier Return Note Header Details
When you have created a new Supplier Return Note you must enter details in the fields in the header section. This involves entering the Supplier and entering/defining other important details.
The procedure for entering Supplier Return Note header details is as follows.
Note: Use your [Tab] key to move from one field to the next. Mandatory Fields (fields which must contain a value before a function can be completed) are shown with a yellow background or with an 'i' next to the field. Some of the following fields may be shown or hidden, depending on your system configuration.
Staff ID
Staff ID details are added by default when the Supplier Return Note is created, to identify the staff member who created the Supplier Return Note. You may (if your user permissions allow) re-enter your Staff ID if a different user is shown.
Entering The Supplier
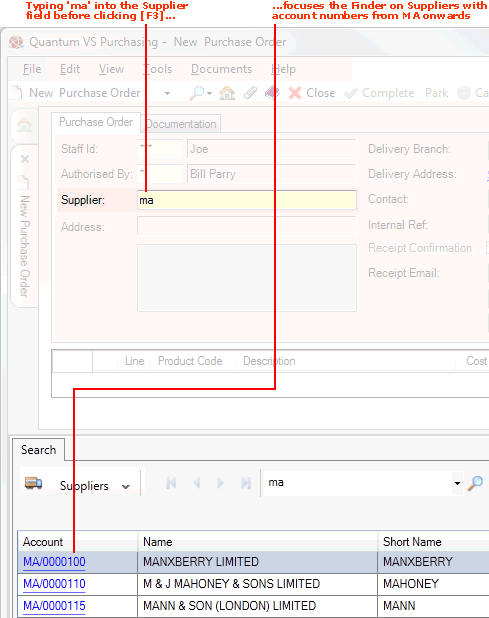
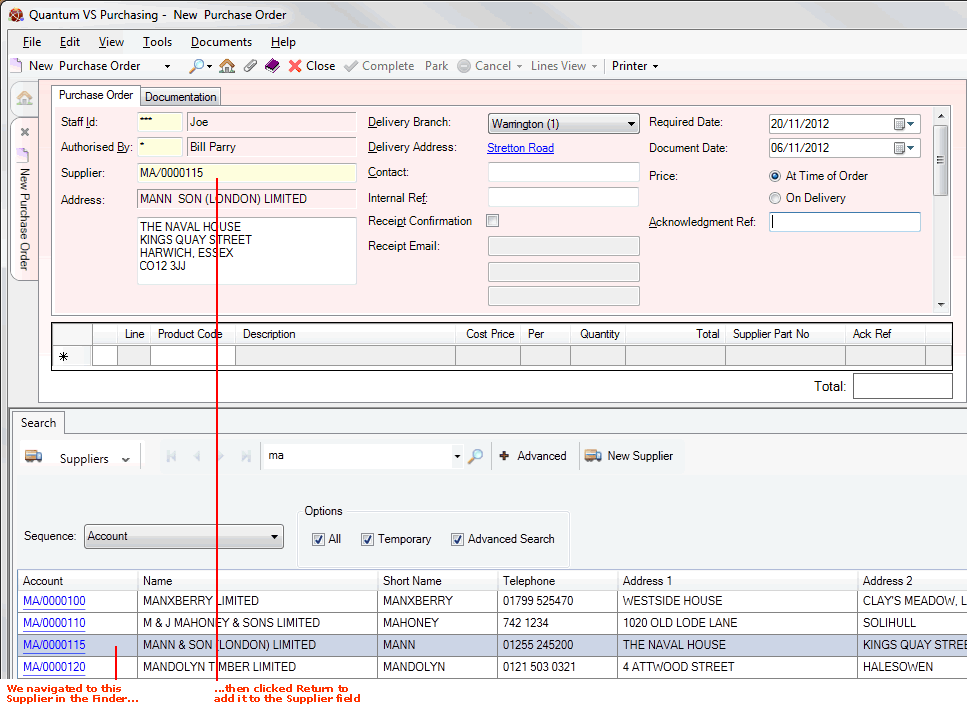
Use your mouse or click [Tab] to move your cursor to the Supplier field, in which you must specify the supplier you are returning the goods (or their value) to.
If you know the Supplier's Account Number (e.g. AB/0000125) or Short Name (e.g. Absolute), type it into the Supplier field.
If you don't know the Supplier's Account Number or Short Name, use the Finder to locate and select it. To do this:
For further details on using the Finder to locate and select a Supplier record see Finding Suppliers.
Working With Pop-Up Supplier Windows
After entering the Supplier, a pop-up window may appear to give a reminder and/or useful information about the supplier. For example:
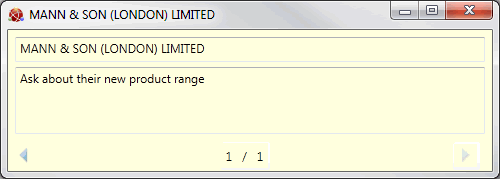
Close this window by clicking [F12] or [Esc] once you have read the text - and take any actions as recommended. If necessary, scroll down and/or click an arrow key to move to the next/previous page.
Note: Supplier-related Notes and pop-ups are created in Supplier Maintenance. See Creating Supplier Notes.
Selecting The Supplier Return Note 'Type'
Use the 'Type' radio buttons to select one of the following:
Entering/Editing Details In The Remaining Header Fields
When you enter the Supplier, most of the header fields are populated automatically based on settings in the Supplier record and on other system settings.
The cursor is placed automatically in the next available header field.
Enter - or edit the default - details in the available header fields as appropriate:
Address
The Address field is populated automatically with the Supplier's main site address. You may overtype this if you wish to specify a different postal address.
Return Branch/Delivery Address
The Return Branch (the branch returning the goods, or their value) and Delivery Address (the address of the branch) fields are populated automatically based on your user settings.
You may select an alternative Return Branch from the drop-down menu if your user permissions allow. To specify an alternative Delivery Address: click the hyperlinked address to display the Delivery Address window, enter the address and post code in the available fields, then click OK to close the window.
Contact
The Contact field records the name of your contact at the supplier company. This is populated automatically from the Supplier record but you may add/amend the contact as appropriate.
Internal Ref
The Internal Ref field may be used to enter any text required as an internal reference.
Despatch Ref / Collection Ref
These are optional information fields for printing on documentation. Enter details in the following fields if required:
Document Date
This field refers to the date the Supplier Return Note is created. It will default to today’s date but may be changed as required. Clicking on the drop-down list will provide a calendar, from which you may select a date.
Expected Date
This field refers to the date by which the goods - or their value - should be returned. Once the Supplier has been entered this is calculated automatically by taking today's date and adding the default lead time (in days) from the Supplier record. However, you may change this if necessary: clicking on the drop-down list will provide a calendar, from which you may select a date.
Entering Line Details
When you have completed the header details, click [Tab] to place your cursor in the lines area and begin entering line details.
Note: At this point the Supplier Return Note is assigned a number. The tab will now read Supplier Return Note 001/0000180 (or a similar number), rather than New Supplier Return Note.
Note: For an overview of the 'supplier return' procedure see Working With Supplier Returns. To review the full purchasing procedure see the Purchasing Overview.
NEXT: Entering Supplier Return Note Product Details