|
Quantum VS Help: Purchasing |
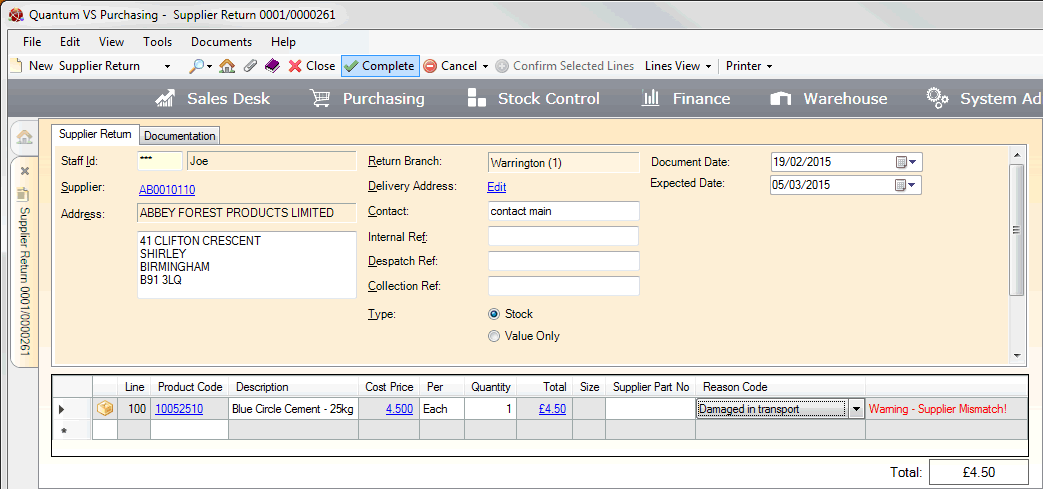
When you have added header details, lines and reviewed Documentation details as required you will need to Complete the Supplier Return Note. On Completion the Supplier Return Note will automatically be 'printed' to a specified destination (i.e. a printer, email and/or fax number, and/or to disk).
To do this, click Complete on the Toolbar - Sub Menu:
After clicking Complete, the Supplier Return Note is printed and closed automatically. You may retrieve it from the Recent Documents section of the Home tab or from the Finder - see Finding Supplier Return Notes.
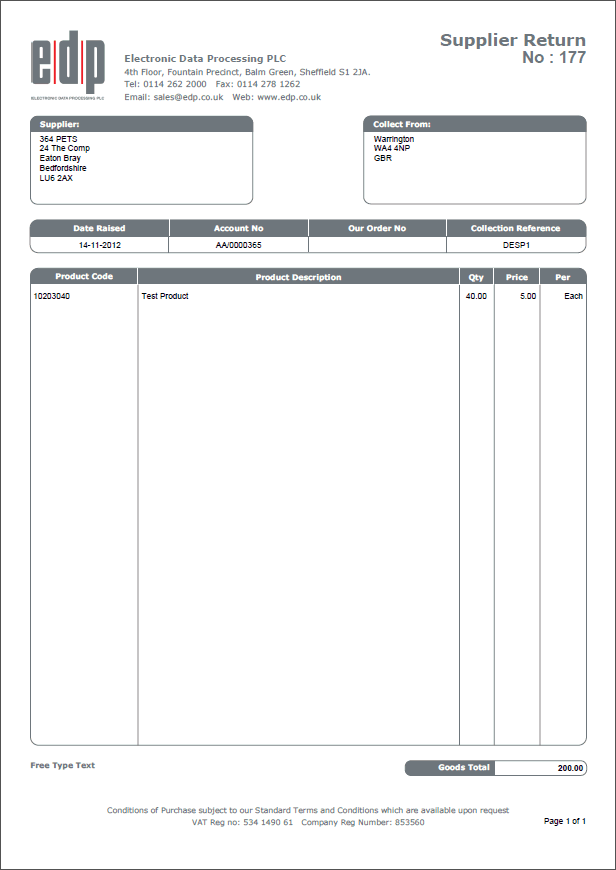
The Supplier Return Note is automatically 'printed' on Completion.
The default output method and Supplier Contact is the one defined for the document type 'Supplier Return' in the Document Defaults Tab for this Supplier. If no Document default is specified, the default 'print' destination is the default specified for the document type 'Supplier Return Note' in your User record > IO Control Fields tab.
Notes: (1) You may use Print Groups to view, print and email/fax any document saved to Disk (i.e. to the Linux Host Server). (2) Many Quantum VS document types and Reports are output as XML files which the system automatically converts into 'formatted' PDF files which may be printed via a printer, sent by email, faxed, saved to disk or sent via the Quantum VS XML Highway. See Setting Up XML To PDF Document Printing.
You may specify an alternative print location for this Supplier Return Note. This will override any defaults for this document only. To do this:
1. When the document is open, select Printer > Print Options from the Toolbar - Sub Menu.
2. The Print Option Window displays:
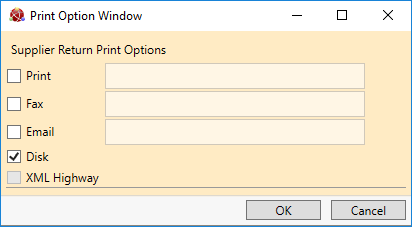
Select print options by checking Print, Fax, Email and/or Disk and entering the print destination as necessary in the field to the right.
Selecting XML Highway means the document will be transmitted to the Customer Contact via Quantum VS Highway. For this option to be available, XML Print Records must be configured - see Configuring XML Print Records For Quantum VS Highway.
3. When you have finished selecting Print Options, click OK.
This will store print options until the Supplier Return Note is printed (automatically or manually).
You may manually print - or reprint - a Completed Supplier Return Note. This will override any defaults for this document only. To do this:
1. When the document is open, select Printer > Print from the Toolbar - Sub Menu.
2. The Print Option Window displays:
Select print options by checking Print, Fax, Email and/or Disk and entering the print destination as necessary in the field to the right.
Selecting XML Highway means the document will be transmitted to the Customer Contact via Quantum VS Highway. For this option to be available, XML Print Records must be configured - see Configuring XML Print Records For Quantum VS Highway.
3. When you have finished selecting Print Options, click OK.
4. The document is 'printed' to the specified location. A dialogue window will indicate that printing was successful. Click OK to close it.
When the supplier has confirmed receipt of the Supplier Return Note - and any returned goods - you will need to Confirm the lines on the SRN, which confirms that the supplier has received the stated quantity of each product.
Note: For an overview of the supplier return procedure see Working With Supplier Returns. To review the full purchasing procedure see the Purchasing Overview.