|
Quantum VS Help: Sales Desk |
A Consignment Note may be manually 'printed' and Confirmed to be given to the Carrier, featuring details of goods to be transported to the Customer (or 'consignee'). It may be countersigned by the Carrier as a proof of receipt of a consignment to be delivered.
The manual 'print/Confirmation' procedure is described below - see Printing/Confirming A Consignment Note.
You may also:
Notes: (1) You may Print/Confirm a Consignment Note only when a Sales Order has been Completed and the goods have been confirmed (either manually, or automatically by the system) as picked, assembled and despatched (i.e. Picking Notes, Delivery Assembly and Despatch Notes for the Sales Order have been Confirmed - see The Picking, Delivery Assembly, Despatch And Invoicing Cycle). (2) Manual Consignment Note Print/Confirmation is not required if automatic Consignment Note Print/Confirmation is enabled on your system for Collected and/or Delivered orders. In this case, the Consignment Note is automatically given Printed/Confirmed status after Despatch Note Confirmation, following Completion of the Sales Order. For further details see Working With Consignment Notes.
To Print/Confirm a Consignment Note manually:
1. Do one of the following:
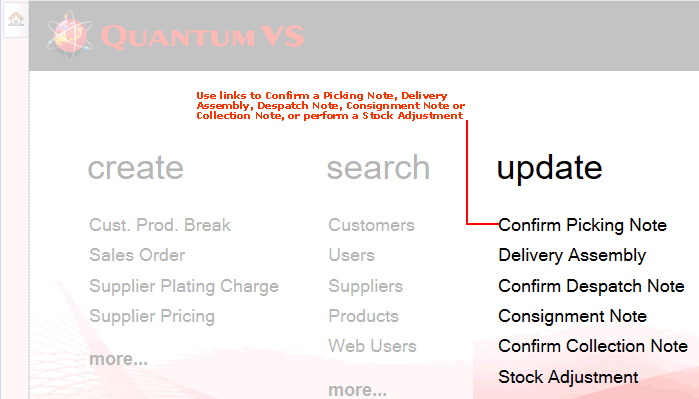
From the Home tab, under update, select Consignment Note.
From the Mega Menu, in Warehouse under update, select Consignment Note.
The Confirm Consignment Note tab displays:
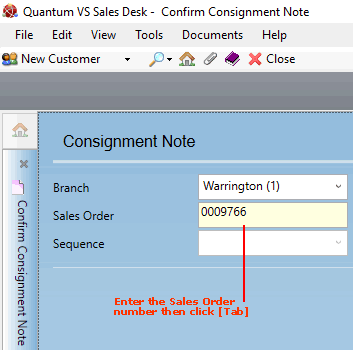
2. The Branch field defaults to your home Branch. If the consignment is coming from a different branch, select it in the Branch field.
3. Enter the Sales Order number in the available field, then click [Tab] to retrieve Consignment Note details.
The Consignment Note displays in its own tab, ready for Print/Confirmation:
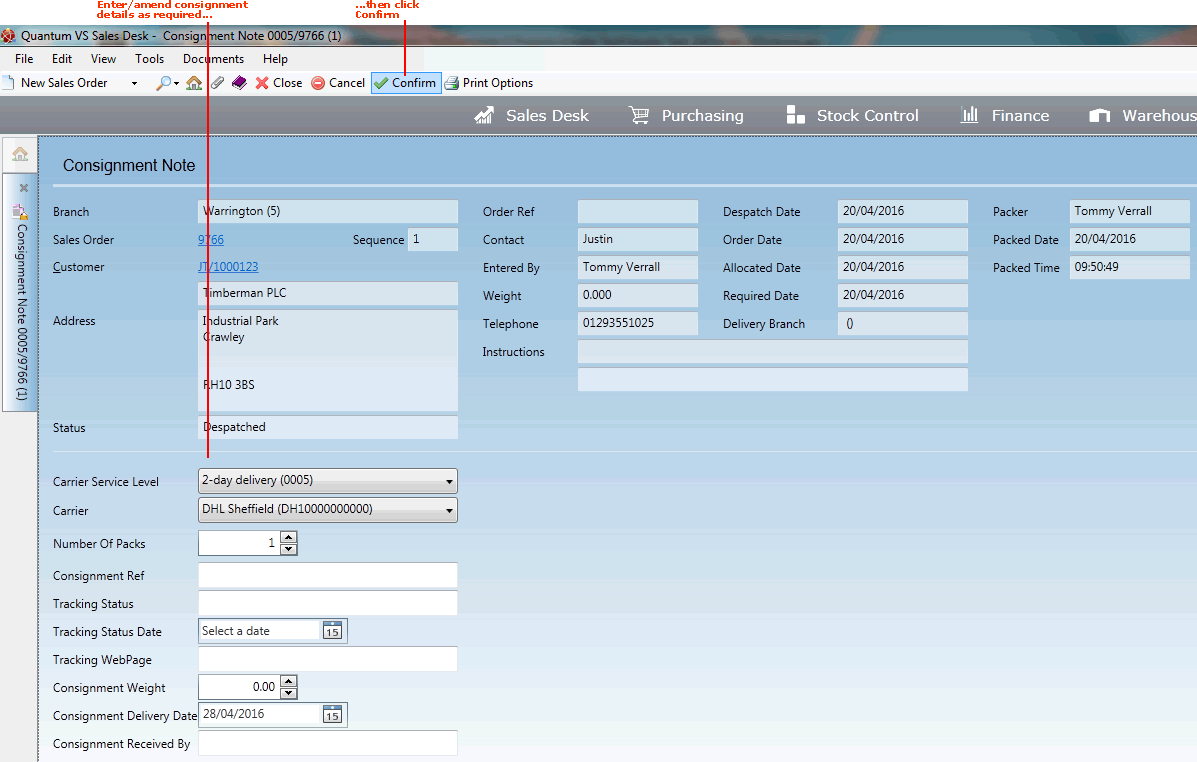
The fields in the upper section are non-amendable and give information about the Sales Order, Customer and Branch and order Status. You may open the Sales Order or Customer record by clicking the appropriate hyperlink. Additional fields give information about the despatch and are taken from the related Despatch Note:
Sequence: Multiple Despatch Notes may be produced from one Sales Order (e.g. if not all of the stock is initially available or despatched). A Sequence number of 2, for example, indicates the second Despatch Note for the listed Sales Order.
Status: Shows the status of the Despatch Note for the Sales Order; i.e. Unprinted, Printed, Despatched or Invoiced.
Note: If the Despatch Note's status is 'Unprinted' or 'Printed' you will need to confirm and potentially also print the Despatch Note before you can print/confirm the Consignment Note and commence the Invoicing stage - see Printing A Despatch Note Manually and Confirming A Despatch Note Manually.
Order Ref: A reference number for the order.
Contact: The contact name of the person at the Customer company dealing with the order.
Entered By: The name of the User/staff member who created the Sales Order.
Despatch Date: The date on which the goods were despatched.
Order Date: The date on which the order was placed, set when creating the Sales Order.
Allocated Date: The date on which the goods were allocated for despatch.
Required Date: The date on which the goods are required, set when creating the Sales Order.
Delivery Branch: The Branch from which the goods will be despatched. This is typically the same as the Branch field. However, there is the option when raising a Sales Order to specify that certain product lines will be despatched from an alternative Branch.
Invoice: When a Sales Invoice has been raised against the Sales Order, the (Sales) Invoice number displays here. This is hyperlinked: click the hyperlink to view the Sales Invoice.
Weight: The weight of the order items. This is populated from the Weight (Per UoM) field in the Stock tab of the Product record - see Issues And Stock Tab: Viewing Product Issues And Stock Details and Entering Stock Details.
Instructions: Displays default Customer delivery instructions. This is populated from the Delivery Details field in the Main tab of the Customer record - see General Details Tab: Viewing A Customer's General Details.
Packer: The staff number of the person who packed the goods.
Packed Date: The date on which the goods were packed.
Packed Time: The time the goods were packed.
Note: The Packed Date and Packed Time fields are not populated if the Bulk Despatch Confirmation process is used to Confirm the Despatch Note.
4. Enter details about the consignment in the fields in the lower section, as follows:
The Carrier Service Level and Carrier fields show the Carrier Service Level / Carrier selected (manually, or by the system) earlier in the Sales Order cycle. You may amend these as necessary - for example, if you or the Customer wish to use a different Carrier Service Level or Carrier. The procedure is the same as when adding/amending the Carrier Service Level/Carrier in the Add Delivery Charge window - see Adding Carriage / Premium Delivery Charges / Carrier Requirements.
Other fields related to the consignment are:
No Of Packs: The number of items in the consignment.
Consignment Ref.: A reference for the consignment; e.g. Tuesday DHL Courier A56.
Tracking Status: Tracking status of the consignment; e.g. on van.
Tracking Status Date: Date/time of entry of Tracking Status.
Tracking Web Page: The URL of the Carrier's website, enabling the User/Customer to track consignment status.
Consignment Weight: The weight of the consignment.
Consignment Delivery Date: The date on which the consignment was received by the Carrier for delivery.
Consignment Received By: The name of the Carrier operative/delivery driver receiving the consignment for delivery.
5. To Confirm/Print the Consignment Note, click Confirm on the toolbar (as displayed above).
Note: To cancel Confirmation/Print of the Consignment Note, click Cancel on the toolbar.
The Consignment Note is 'printed' to the specified print destination. For example, it might be sent to a printer, to be given to the Carrier's delivery driver or operative; alternatively it might be sent directly to the Carrier by email, fax or via the Quantum VS Highway.
When a Consignment Note is Printed/Confirmed, details are also updated on the Despatch Note. To view carrier- and/or haulage-related details for a Sales Order - and related despatches/consignments - see Viewing Carrier And/Or Haulage Details For The Sales Order.
The default 'print' destination displayed is the default specified for the document type 'Consignment Note' in your User record > IO Control Fields tab.
Notes: (1) You may use Print Groups to view, print and email/fax any document saved to Disk (i.e. to the Linux Host Server). (2) Many Quantum VS document types and Reports are output as XML files which the system automatically converts into 'formatted' PDF files which may be printed via a printer, sent by email, faxed, saved to disk or sent via the Quantum VS XML Highway. See Setting Up XML To PDF Document Printing.
To 'print' the Consignment Note to another destination:
1. Click Print Options on the toolbar:
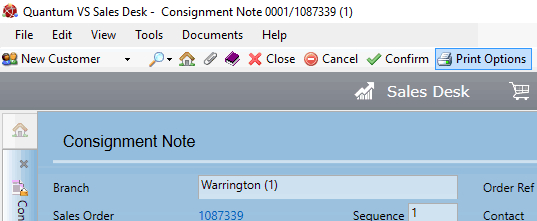
2. The Print Options window displays:
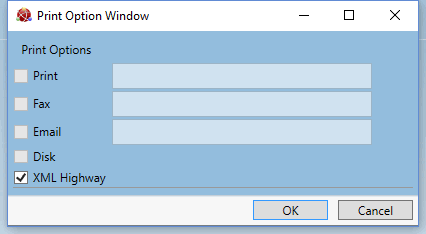
Select print options by checking Print, Fax, Email and/or Disk and entering the print destination as necessary in the field to the right.
Selecting XML Highway means the document will be transmitted to the Customer Contact via Quantum VS Highway. For this option to be available, XML Print Records must be configured - see Configuring XML Print Records For Quantum VS Highway.
3. When you have finished selecting Print Options, click OK.
4. The document is 'printed' to the specified location. A dialogue window will indicate that printing was successful. Click OK to close it.
When a Consignment Note has been Printed/Confirmed, it is displayed in the Finder. See Finding Consignment Notes.
If necessary you may open a previously Printed/Confirmed Consignment Note and Print/Confirm it again. This might be required if you wish to change the Carrier. To do this, click Confirm on the toolbar (as described above).
If necessary you may also reprint a Consignment Note. To do this, click Reprint:
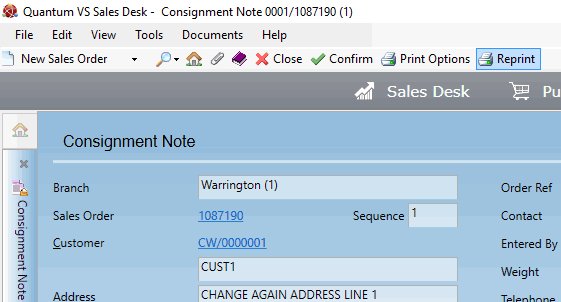
When the Print Options window displays, use the check box fields to specify the print destination, specify the Printer/Fax number/Email address as required (in the fields to the right), then click OK - as described above.
Note: If you amend the Carrier you may be required to change Print Options (see above) before Printing/Confirming the Consignment Note. This is because details (e.g. the Quantum VS Highway configuration) may be different for the new Carrier.