Pre-Allocated, Suggested And Direct Purchase Orders
The procedures described earlier in this chapter are for standard 'Stock' type Purchase Orders. The following types of Purchase Order have a different set-up/completion procedure:
-
Pre-Allocated Purchase Orders - a 'skeleton' order created when you are ordering (usually) over the telephone and the supplier needs you to give them a Purchase Order number. These can later be retrieved and Completed as a standard 'stock' Purchase Order.
-
Suggested Purchase Orders - orders automatically bulk-generated by the Suggested Orders Report based on existing stock and reorder levels, or from a .csv file. These can later be retrieved and converted into a standard 'stock' Purchase Order.
-
Direct Purchase Orders - orders created - usually automatically - following a Direct Sales Order.
Note: After Completion, information about the Purchase Order's Type (Stock or Direct), State (Suggested, Pre-Allocated, Parked, Confirmed, Printed or Cancelled) and GRN Status (No Deliveries, Part Delivered, All Delivered or Cancelled) is displayed in the header fields. See Purchase Order Types, States And GRN Status.
A Pre-Allocated Purchase Order is a 'skeleton' Purchase Order which has a Purchase Order (Document) number and supplier details, but no product details.
You might create a Pre-Allocated Purchase Order when you need to place an order with a supplier quickly - usually over the phone - and the supplier requires a Purchase Order number from you in order to place the order.
In this situation you may create a Pre-Allocated Purchase Order and give the supplier the Purchase Order number. At a later time/date you may then locate and open the Purchase Order and enter additional details to convert the order to a standard Purchase Order. The procedure is as follows:
Creating A New Pre-Allocated Purchase Order
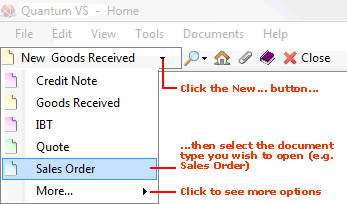
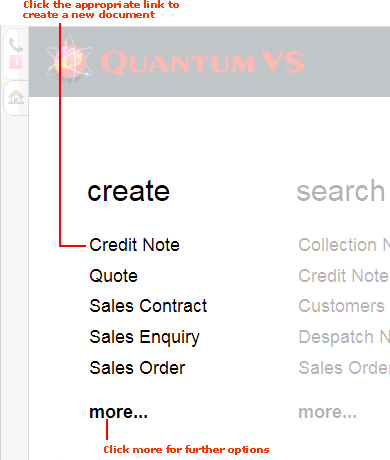
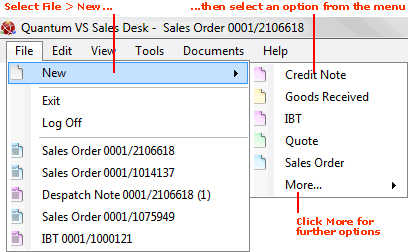
To create a new Pre-Allocated Purchase Order use one of the following methods:
A blank Pre-Allocated Purchase Order opens in a new tab - New Pre-Allocated Purchase Order - on your desktop:
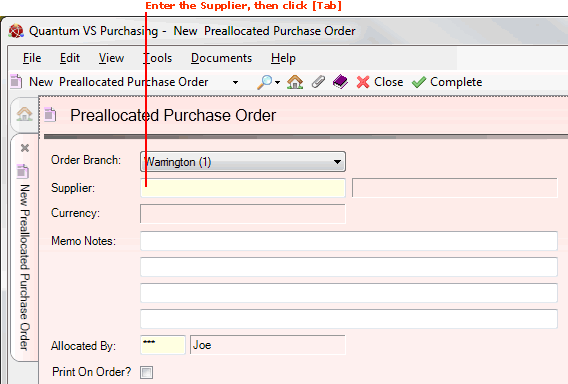
To create the Pre-Allocated Purchase Order, do the following:
Note: Use your [Tab] key to move from one field to the next. Mandatory Fields (fields which must contain a value before a function can be completed) are shown with a yellow background or with an 'i' next to the field. Some of the following fields may be shown or hidden, depending on your system configuration.
1. The Order Branch displays the branch placing the order. The 'home' branch is selected by default but you may select an alternative using the drop-down menu.
2. Enter the Supplier you are ordering goods from.
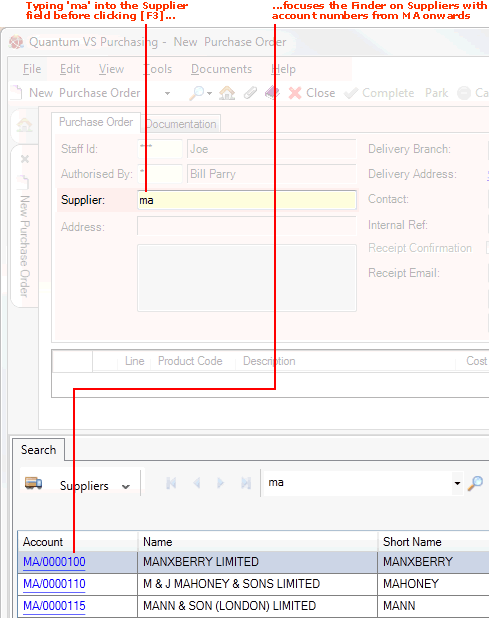
If you know the Supplier's Account Number (e.g. AB/0010110) or Short Name (e.g. Abbey), type it into the Supplier field.
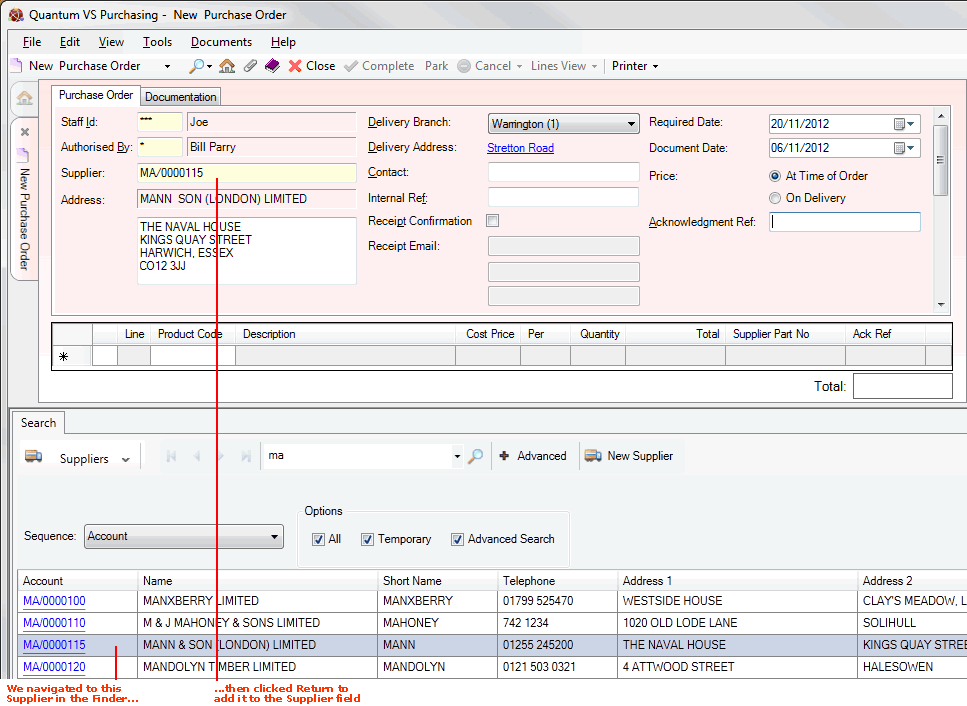
If you don't know the Supplier's Account Number or Short Name, use the Finder to locate and select it. To do this:
For further details on using the Finder to locate and select a Supplier record see Finding Suppliers.
Note: After entering the Supplier, a pop-up window may appear to give a reminder and/or useful information about the supplier. Close this window by clicking [F12] or [Esc] once you have read the text - and take any actions as recommended. (If necessary, scroll down and/or click an arrow key to move to the next/previous page.) Supplier-related Notes and pop-ups are created in Supplier Maintenance. See Creating Supplier Notes.
When you enter the Supplier their full name and Currency are populated automatically from the Supplier record.
3. Enter any Memo Notes in the appropriate fields. This text may be used as a reference or reminder about the Purchase Order (e.g. Regular order placed with Phil by phone).
4. The Allocated By field indicates the user who placed the order. 'Your' user details are entered by default, but you may enter an alternative user number if necessary.
5. Print On Order: Check this field if you wish to have the Memo Notes printed on the Purchase Order. Leave unchecked if not required.
6. Complete the Pre-Allocated Purchase Order by selecting Complete from the Toolbar - Sub Menu:

A message will appear, indicating that a pre-allocated Purchase Order has been created.
The Pre-Allocated Purchase Order is saved and made available for viewing/selection in the Finder. You may wish to make a note of the number for later recall.
Adding Product Lines To Pre-Allocated Purchase Orders
At a later time/date you will need to open the Pre-Allocated Purchase Order, add the Product lines and then Complete the order in the same way as for a standard Stock-type Purchase Order. To do this:
1. Use the Finder - set to Search Purchase Orders - to locate and open the Pre-Allocated Purchase Order. See Finding Purchase Orders.
Note: Pre-Allocated Purchase Orders are listed as 'Pre-Allocated' in the Status column.
Locate the required Pre-Allocated Purchase Order in the Finder's search results. To do this:
-
Scroll through the pages of search results in the Finder until you see the required order. Or:
-
If you know the Purchase Order number, type it into the Search field and click the Search icon on the Finder Toolbar. Or:
-
Click Advanced on the Finder Toolbar, then uncheck some of the Include These Results filters to reduce the number of results. (For example: Deselect Direct, Suggested, Parked, Cancelled, Undelivered, Part Delivered and Fully Delivered. Make sure Pre-Allocated and Stock are checked.) Then click the Search icon on the Finder Toolbar.
To open the order, either:
-
Click the hyperlinked Purchase Order number in the Document column. Or:
-
Right-click on the Purchase Order line in the search results, then select the View... option.
The Purchase Order opens. Note that the header details include the Supplier and the order has a Status (and Order Type) of Pre-Allocated. However, no Product lines have been entered:
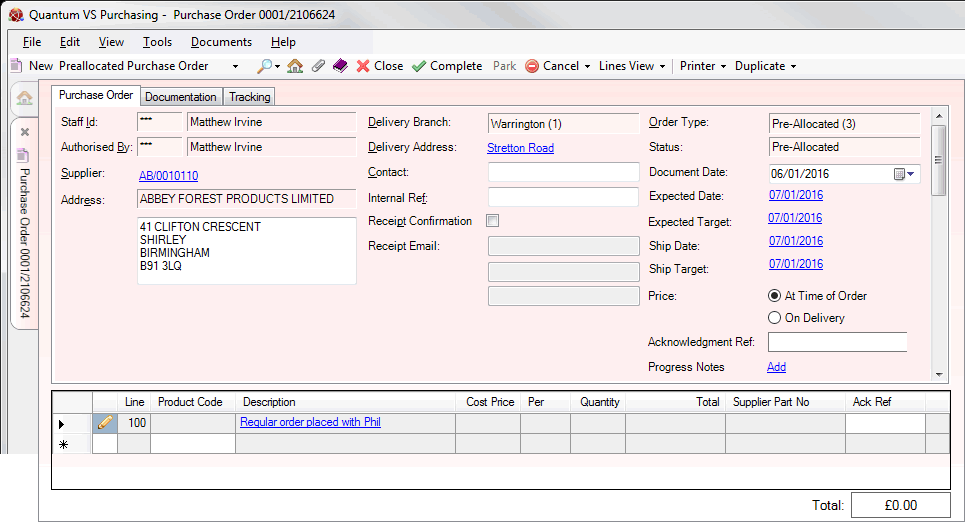
2. Add any further header details - such as a Contact, Internal Ref or Acknowledgement Ref - if necessary. See Entering Purchase Order Header Details.
3. After entering details in the final header field, click [Tab] to place your cursor within the Product Lines area. Enter the product lines as necessary. For details see Adding Product Lines To Purchase Orders.
4. Complete the Purchase Order by selecting Complete from the Toolbar - Sub Menu. The order will now progress as a standard Stock order. See Completing And Printing Purchase Orders.
A 'Suggested' Purchase Order is a type of Purchase Order created by running the Suggested Orders Report. This report will trawl through the stock records and create Suggested Purchase Orders based on various user-definable criteria, such as stock levels and reorder levels.
Suggested Purchase Orders can then be reviewed manually and converted to real Purchase Orders as required. See Converting Suggested Purchase Orders.
A Direct Order is a type of Purchase Order on which, following a Direct Sales Order, stock is ordered direct from the Supplier at the time of purchase by the Customers.
By default, Purchase Ordering is automated for Direct Sales: a Direct Purchase Order is created and 'printed' automatically on Completion of a Direct Sales Order is completed. Depending on the set 'print' method the Purchase Order may be printed and issued to the Supplier manually, or it may be emailed or faxed automatically (or saved to disk).
Note: Although the default system setting is for a Purchase Order to be created automatically when a Direct Sales Order is completed, there is an option for the System Administrator to turn this feature off (via the Direct Purchase Order field in the Miscellaneous tab within Price Book Flags Maintenance). If this is the case you will need to manually enter header and product details before Completing the Purchase Order.
On issuing the Purchase Order to the Supplier, the Supplier will deliver the goods to the Customer and issue their invoice. You will then register/match the received invoice with the original Purchase Order.
For further details see Direct Sales Orders.
You may edit a Direct Purchase Order if it has been 'held' following Completion; any changes made to the Direct Sales Order are applied to the associated Purchase Order. See Editing Direct Sales Orders.
NEXT: Generating Purchase Orders In Bulk
