|
Quantum VS Help: Purchasing |
When booking in stock, you must Confirm the Goods Received Note to confirm that you have received the listed product lines in the stated quantities. On Confirmation the GRN will automatically be 'printed' to a specified destination (i.e. a printer, email and/or fax number, and/or to disk).
Note: Before Confirming the GRN, make sure you have recorded any variance for the received lines. You may Confirm the GRN immediately if the quantity Received matches the Expected quantity for ALL Product lines and no batch allocation is required.
To Confirm the GRN, click Confirm on the Toolbar - Sub-Menu:

Note: A warning message will display if any Product line flagged for 'batch traceability' has not been allocated a Batch Reference, Bin or Serial Number. You will need to click the Unconfirmed hyperlink in the Receipt Details column on the relevant line and record Serial Number, Batch Number or Bin Location details for the received goods. See Making GRN Batch Allocations Manually.
Note: If the 'Haulage details have not been specified. Continue?' message displays, either click Yes to Complete the GRN without specifying Haulage Details, or click No and enter Haulage Details before Confirming and Printing the GRN.
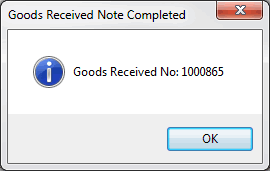
A message displays to indicate that the Goods Received Note has been Completed.

Note: If Document Scanning is enabled, you may be given the option to Scan the document. See Scanning On Document Confirmation.
Click OK to close it. The Goods Received Note is closed.
Confirming the Goods Received Note formally confirms the receipt of goods into stock and concludes the 'booking in' procedure. On Confirmation of the Goods Received Note a Stock record is created or updated and the received goods will now be available to be sold.
If the received goods were 'batch traceable' and assigned a Batch/Serial/Bin number on receipt, a Product Inventory record is also created on Confirmation.
After GRN Confirmation:
The Goods Received Note is automatically printed to the specified print destination. See Printing The Goods Received Note below.
The Goods Received Note becomes non-amendable.
The Goods Received Note may be retrieved from the Finder, set to Search Goods Received. See Finding Goods Received Notes.
On the original Purchase Order, the Goods Received Note is shown under the Tracking tab. Click on the GRN to open it. See Opening Documents From The Purchase Order's Tracking Tab.
The GRN Status field in the header details of the original Purchase Order is updated to show that the order was All or Part Delivered. See Purchase Order Types, States And GRN Status.
The GRN header fields - Currency, Currency Code, Invoice Value and Outstanding Value - are populated with information.
On Confirming the Goods Received Note it is 'printed' automatically (i.e. printed as a hard copy; emailed or faxed to a contact; and/or saved to disk, depending on your system settings).
The default output method and Supplier Contact is the one defined for the document type 'Goods Received Note' in the Document Defaults Tab for this Supplier. If no Document default is specified, the default 'print' destination is the default specified for the document type 'Goods Received Note' in your User record > IO Control Fields tab.
Notes: (1) You may use Print Groups to view, print and email/fax any document saved to Disk (i.e. to the Linux Host Server). (2) Many Quantum VS document types and Reports are output as XML files which the system automatically converts into 'formatted' PDF files which may be printed via a printer, sent by email, faxed, saved to disk or sent via the Quantum VS XML Highway. See Setting Up XML To PDF Document Printing.
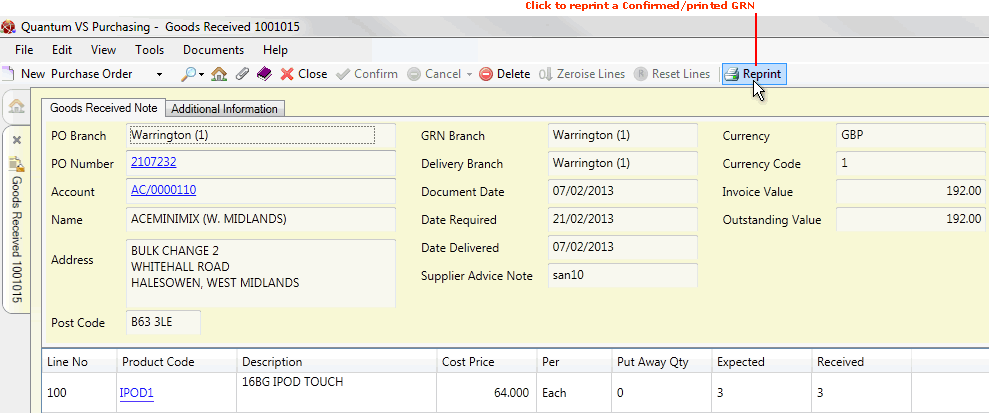
You may manually reprint a Confirmed Goods Received Note. To do this:
1. When the document is open, select Reprint from the Toolbar - Sub Menu:

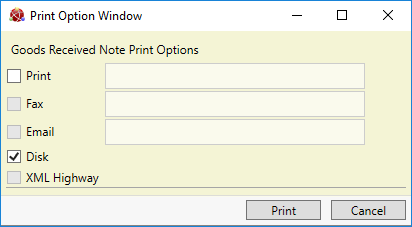
2. The Print Option Window displays:

Select print options by checking Print, Fax, Email and/or Disk and entering the print destination as necessary in the field to the right.
Selecting XML Highway means the document will be transmitted to the Customer Contact via Quantum VS Highway. For this option to be available, XML Print Records must be configured - see Configuring XML Print Records For Quantum VS Highway.
3. When you have selected Print Options, click Print.
4. The document is 'printed' to the specified location. A dialogue window will indicate that printing was successful. Click OK to close it.